

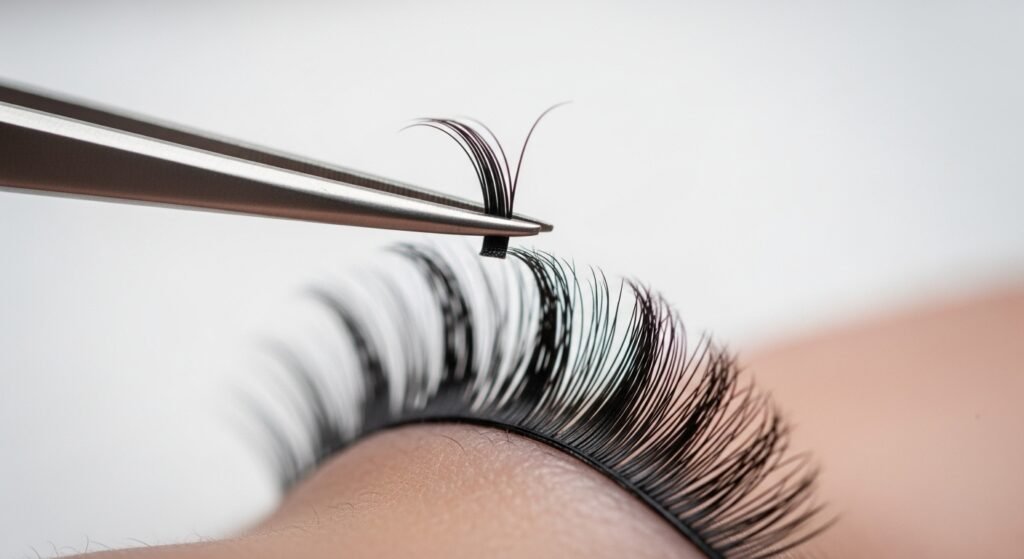
Learning how to take lash extensions off at home is a total game-changer for your beauty routine. You might love the drama of long lashes but hate the maintenance. Sometimes your lashes start looking a bit messy as they grow out. It is super tempting to just pull them off with your fingers. Please do not do that because you will hurt your real lashes. This guide shows you the best ways to keep your eyes safe and healthy.
Introduction to Eyelash Extension Removal
Taking care of your eyes is the most important part of any beauty task. Your eyelids have very thin skin that can get irritated easily. The natural lash follicle is quite fragile and needs gentle handling. If you are too rough, you might cause permanent damage to your lash line. This article teaches you the right steps to avoid any drama or pain.
The Delicate Nature of Eyelash Health
Your natural lashes protect your eyes from dust and debris every day. Each hair follows a specific lash growth cycle of about six to eight weeks. If you pull out an extension, you might pull out a young natural lash. This can lead to gaps in your lash line that take months to fix. We want to make sure your natural lashes stay thick and strong.
Why Safe Removal Matters
Doing things the wrong way can lead to some pretty nasty results. You might end up with traction alopecia, which means your hair stops growing. Using the wrong tools can also lead to eye infections or redness. A safe removal means you can get new extensions again very soon. It keeps your natural lashes ready for the next set of glam.
The Goal of This Guide
We want to give you a clear roadmap for your DIY removal journey. This guide covers everything from the tools you need to the best oils to use. You will learn how to spot when you need a professional lash technician. By the end, you will know exactly how to take lash extensions off at home. Your lash health is our top priority throughout every single step.
The Science of Lash Adhesives
Lash glue is not like the glue you used in grade school. Most professionals use a cyanoacrylate-based adhesive that is very strong. It creates a plastic-like bond that is designed to be waterproof. This bond is meant to last for several weeks through showers and sweat. Understanding this chemistry helps you realize why you need a special solvent.
- Bonding Strength: The adhesive creates a semi-permanent attachment to the hair.
- Waterproof Nature: Standard water will not dissolve the bond at all.
- Oil Sensitivity: High-quality oils are the natural enemy of this specific glue.
- Curing Process: The glue hardens using humidity in the air to stay firm.
Why You Might Need to Remove Your Extensions
There are many reasons why you might want those extensions gone today. Maybe they are just getting too old and looking a bit wonky. Or perhaps you are having a bad reaction to the products used. It is always better to remove them than to let them cause trouble. Knowing when to call it quits is part of being a beauty pro.
Allergic Reactions and Sensitivities
Sometimes your body just says no to the lash glue or the fibers. You might notice your eyelids getting puffy or feeling very itchy. If your eyes stay red for more than a day, it is a sign. Removing the extensions can stop the irritation from getting any worse. Always listen to what your skin is trying to tell you.
Natural Lash Growth Cycles
Your natural lashes are constantly moving and growing longer every day. As they grow, the extension moves further away from your eyelid. This can make the lashes feel heavy or start to twist around. It creates gaps that make your eyes look a little bit uneven. Removal helps reset your look so you can start fresh again.
General Maintenance and Hygiene
Extensions can trap a lot of dirt, makeup, and natural oils. Over time, this buildup can lead to a condition called blepharitis. If you can’t get them clean with a lash bath, it is time. Removing them lets you give your real eyelids a deep clean. Clean lashes are happy lashes that grow much faster and stronger.
Personal Comfort
Sometimes extensions just start to feel itchy or scratchy against your skin. If they were applied poorly, they might poke your eyelid constantly. No one wants to deal with that kind of poking all day long. Taking them off can provide instant relief from that annoying physical weight. You deserve to feel comfortable and beautiful at the same time.
Recognizing Poor Application Signs
Not every lash tech is a master of their craft unfortunately. You can usually tell if something went wrong during the application. If you see these signs, you should remove the set quickly. It will save your natural lashes from long-term damage or breakage.
- Lash Stickies: This happens when several natural lashes get stuck together.
- Incorrect Weight: Extensions that are too thick can pull your natural lashes out.
- Visible Glue: Clumps of glue at the base are a major red flag.
- Twisted Lashes: Extensions that won’t stay straight usually mean poor bonding.
Critical Warnings and Debunking Myths
The internet is full of bad advice on how to take lash extensions off at home. Some people suggest things that are actually dangerous for your vision. We want to clear up the confusion before you start your process. Safety is way more important than saving a few minutes of time. Let’s look at what you should definitely avoid doing at home.
The Vaseline Myth
Many people think petroleum jelly like Vaseline will dissolve lash glue. This is a myth because Vaseline is too thick to penetrate the bond. It might make the lashes greasy, but the glue stays strong. It can also clog the tiny pores along your lash line. Using it often leads to a messy and unsuccessful removal attempt.
The Danger of Tugging and Pulling
Your natural lashes are held in by very small, delicate follicles. If you pull an extension, you are basically plucking your hair. This can cause the follicle to go into a resting phase. Sometimes the hair might not grow back for a long time. Patience is the only way to keep your natural fringe healthy.
Harsh Chemicals to Avoid
Never use things like nail polish remover or pure alcohol near your eyes. These liquids can cause serious chemical burns to your sensitive cornea. Even if you are careful, the fumes can irritate your eyes. Only use products that are labeled as safe for the eye area. Your sight is way too precious to risk for a lash.
The Danger of Using Nail Polish Remover
Acetone is a powerful solvent used to strip paint and plastic. If it gets in your eye, it can cause permanent damage. It also dries out your natural lashes until they become brittle. Brittle lashes snap off very easily, leaving you with short stubs. Stick to oils or professional removers designed for human skin.
Essential Tools and Supplies for Safe Removal
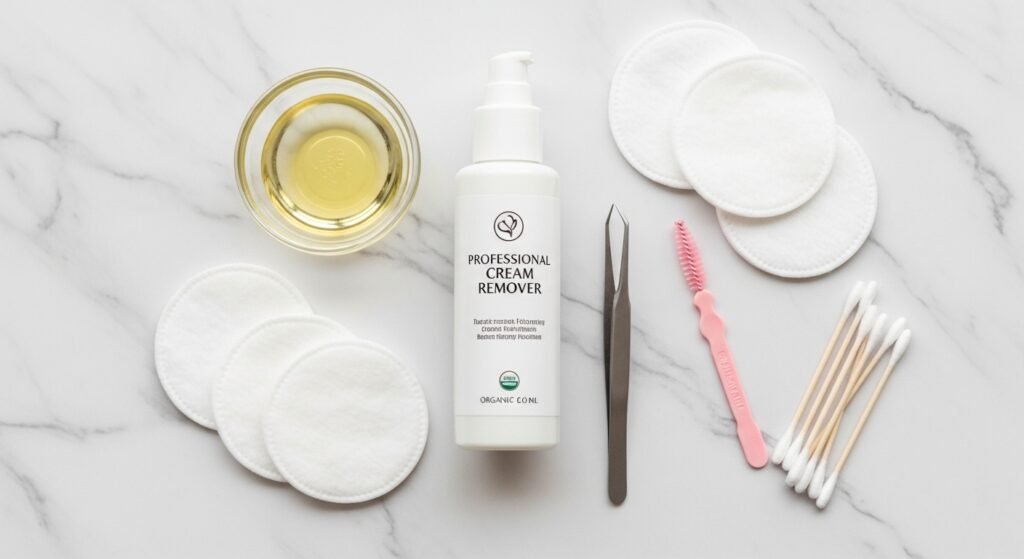
Having the right gear makes the whole process go much smoother. You don’t need a huge kit, just a few key items. Most of these things are probably in your bathroom right now. If not, they are easy to find at a local store. Let’s gather your supplies before we get started on the work.
Professional Grade Solvents
If you want the fastest results, look for a professional remover. Products like the MODELROCK Dual Action Remover are made for this. These solvents are formulated to target the cyanoacrylate bond specifically. They work much faster than natural oils do for most people. Make sure to follow the instructions on the bottle exactly.
Natural Oil Alternatives
If you prefer a gentler approach, natural oils are fantastic options. They take a bit more time but are very nourishing. These oils help break down the glue while hydrating your skin.
- Coconut Oil: This is a fan favorite because it smells great.
- Castor Oil: Many people use this to help their lashes grow.
- Olive Oil: You likely have this in your kitchen cabinet already.
- Baby Oil: This mineral-based oil is very gentle on sensitive skin.
Application Essentials
You will need some basic tools to apply your chosen remover. Precision is key so you don’t get oil inside your eye.
- Q-tips: These are perfect for rubbing the oil onto the lash line.
- Cotton Pads: Use these to wipe away the lashes as they fall.
- Spoolie: A clean mascara wand helps comb the lashes during removal.
- Tweezers: High-quality tweezers help you pick up loose lash extensions.
Choosing Between Gel, Cream, and Liquid Removers
Not all removers have the same texture or consistency. Some are easier for beginners to use at home safely.
- Cream Removers: These stay in place and don’t run into eyes.
- Gel Removers: They work quickly but can be a bit runny.
- Liquid Solvents: These are very thin and best left to professionals.
Preparing the Eye Area for Removal
Preparation is the secret to a stress-free lash removal session. You want to make sure your eyes are ready for action. Taking five minutes to prep saves you from a mess later. Wash your hands first to keep everything clean and hygienic. Then, follow these steps to get your face ready for removal.
Sanitization and Cleanliness
Start by removing all of your eye makeup with a cleanser. You want a clean surface so the oil can reach the glue. Use an oil-free cleanser if you plan to use professional remover. If you have any eye infections, wait until they are gone. Keeping things sterile helps prevent any unwanted redness or bumps.
Patch Testing for Safety
Before you put anything near your eye, do a patch test. Put a small drop of remover on your inner arm. Wait about ten minutes to see if your skin turns red. If it stings or itches, do not use it on eyes. This simple step prevents a major allergic reaction on your face.
Creating a Protective Barrier
You can use lash pads to protect the skin under your eyes. Some people use a little bit of medical tape instead. This prevents the remover from sitting on your lower eyelid skin. It also makes it easier to see the lashes as they fall. Protecting your skin keeps the whole process feeling more comfortable.
Double Cleansing Before Removal
A double cleanse ensures that every bit of debris is gone. Use a gentle soap followed by a lash-specific foam wash. This removes old mascara and eyeliner that might block the solvent. When the lash line is totally clean, the remover works faster. It is the best way to start your DIY lash journey.
The Comprehensive Step-by-Step Removal Process
Now it is time for the main event of the process. Take a deep breath and remember to move very slowly. This is not a race, so give yourself plenty of time. Follow these steps in order for the best possible results. You are going to be a lash removal expert soon.
Softening the Adhesive with Steam

Steam is the best way to start loosening that tough glue. You can use a facial steamer or a bowl of hot water. Place a towel over your head to trap the warm moisture. Do this for about five to ten minutes to open pores. The humidity helps make the adhesive much less brittle and hard.
Strategic Application of the Remover or Oil
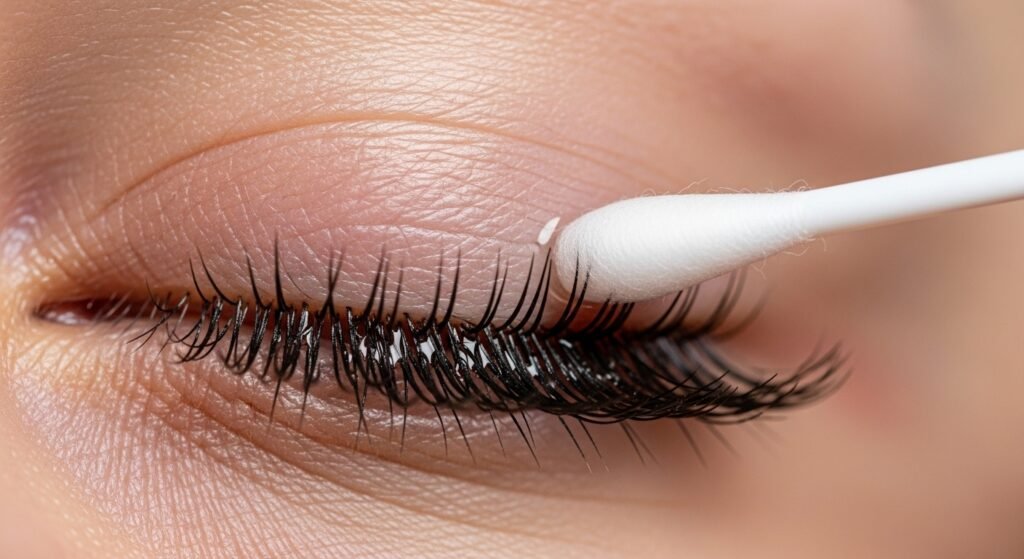
Dip your Q-tip into your oil or the professional remover. Gently swipe it along the base of your lash extensions. Make sure you coat every single lash from the top side. Be careful not to let any of the liquid drip inside. Focus on the area where the extension meets your natural hair.
The Importance of Dwell Time
Dwell time is just a fancy way of saying “wait”. If you use professional remover, wait about thirty seconds. For natural oils, you should wait at least ten minutes. This gives the oil time to penetrate the hard glue bond. If you try to wipe too soon, nothing will happen.
Executing the Gentle Downward Wipe
Take a clean cotton pad and close your eye gently. Swipe the pad in a downward motion toward your cheek. The extensions should start to slide right off the hair. Never scrub back and forth because that causes breakage. If some lashes stay stuck, just apply more oil and wait.
Precision Detachment Using Tweezers
If a few stubborn lashes are hanging on, use your tweezers. Grasp the very base of the extension, not your skin. Only pull if the lash feels like it is sliding easily. If there is any resistance, stop and use more remover. This keeps you from accidentally plucking your own real lashes.
Common Pitfalls and Mistakes to Avoid
Even the most careful person can make a few mistakes. Knowing what usually goes wrong can help you stay safe. Most issues happen when people get in too much of a hurry. Your eyes are very sensitive, so treat them with total respect. Let’s go over the big “don’ts” of at-home removal.
- Rushing the Process: Impatience leads to pulling, which leads to lash loss.
- Using Too Much Product: Extra oil can get in your eyes and sting.
- Picking with Fingers: Your fingers aren’t precise enough and will pull hair.
- Ignoring Pain: If it hurts, you are doing something wrong.
Working on Both Eyes Simultaneously
It is a bad idea to try and do both eyes at once. You need one eye open to see what you are doing. Trying to do both eyes blind is dangerous and very messy. Finish one eye completely before you move to the other side. This gives you total control over the tools and the remover.
Post-Removal Care and Recovery

Once the extensions are gone, your work is not quite finished. Your natural lashes need some serious love and care now. They might feel a little bit weak or thin at first. This is the time to focus on hydration and lash health. Proper aftercare helps your natural lashes bounce back very quickly.
Cleansing and Residue Removal
You must wash your face to remove all the leftover oil. Use a gentle foaming cleanser to get deep into the lashes. Any leftover remover can irritate your skin if left overnight. Dry your eyes by gently patting them with a soft towel. Your eyelids will feel much lighter and cleaner afterward.
Immediate Moisturization and Conditioning
Apply a drop of castor oil or a lash serum immediately. This helps to rehydrate the hair shaft after the process. Natural lashes can get dry from the glue and the remover. Conditioning them makes them look shiny and healthy again. It is like a deep-conditioning treatment for your tiny eye hairs.
The Importance of a “Lash Break”
Your follicles need time to rest after wearing heavy extensions. Most experts suggest waiting two to four weeks for a reset. This allows your natural growth cycle to finish its work. During this time, focus on using serums instead of mascara. Your lashes will be much stronger for your next appointment.
DIY Natural Lash Recovery Mask
You can make a simple mask at home to help recovery. Mix equal parts of Vitamin E oil and castor oil. Use a clean spoolie to brush it on every night. This blend provides essential peptides and vitamins to the follicles. It is a cheap and effective way to get long lashes.
When to Seek Professional Assistance
Sometimes DIY isn’t the best choice for your specific situation. If things get complicated, don’t be afraid to ask for help. A professional lash technician has specialized tools you don’t have. They can handle tough glue without damaging your natural fringe. Knowing when to stop is a sign of great wisdom.
Signs of Persistent Irritation
If your eyes are still red after a day, see a doctor. Swelling that doesn’t go down is a sign of trouble. You might have a small scratch or a mild infection. It is always better to be safe and get an exam. Professional medical advice is much better than a Google search.
Stubborn Adhesive and Hard Bonds
Some glues are just too strong for kitchen oils to break. If the extensions won’t move after three attempts, stop. A pro can use a high-strength solvent that works instantly. They know how to use it without getting it in eyes. Pushing too hard at home will only result in pain.
Emergency Protocol: If Product Gets in Your Eye
If you feel a sharp sting, flush your eyes immediately. Use cool, clean water or a sterile saline solution. Keep flushing for at least fifteen minutes without stopping. Do not rub your eyes as this makes the sting worse. If the burning continues, head to an urgent care clinic.
Comparison of Eyelash Extension Removal Materials and Methods
| Material or Method | Primary Use | Key Benefits | Common Cons |
| Cream Remover | Breaking down professional-grade cyanoacrylate adhesive. | Safest consistency; stays in place without running into the eyes, making it ideal for DIY and beginners. | Slower acting; requires a longer wait time compared to liquid or gel formulas. |
| Gel Remover | Fast-acting removal of stubborn or thick glue bonds. | Efficiency; dissolves the bond very quickly and is easier to control than thin liquids. | Risk of running; can seep into the eye if too much is applied, causing significant stinging. |
| Coconut Oil | Natural, gentle at-home removal and conditioning. | Nourishing; hydrates the natural lashes and skin while breaking down the glue. Very cost-effective. | Time-consuming; requires significant dwell time (10-30 minutes) and can be very messy. |
| Castor Oil | Strengthening natural lashes during the removal process. | Growth support; contains fatty acids that stimulate the follicle while softening the adhesive. | High viscosity; it is very thick and can be difficult to wash off completely after the process. |
| Olive Oil | Household alternative for adhesive breakdown. | Accessibility; almost everyone has it in their pantry. It is hypoallergenic and very gentle. | Weakest solvent; may require multiple applications to remove a full set of fresh extensions. |
| Facial Steam | Pre-removal preparation to soften the glue bond. | Pore opening; softens the adhesive and makes it more porous, allowing oils to penetrate faster. | Incomplete; steam alone will almost never remove extensions without a secondary oil or solvent. |
| Q-Tips / Micro-swabs | Precise application of removers or oils. | Targeted action; allows you to apply product only to the lash line, protecting the eyeball. | Waste; cotton fibers can occasionally get snagged in the lashes if the tip is not lint-free. |
| Professional Technician | Manual removal using professional-grade tools and solvents. | Expertise; zero risk of natural lash damage and ensures a perfectly clean result every time. | Expense; the most costly method and requires traveling to a salon appointment. |
| Lash Pads / Eyetape | Protecting the lower eyelid and skin. | Safety barrier; prevents chemicals or oils from sitting on the sensitive skin under the eye. | Discomfort; some users find the adhesive on the tape or the weight of the pads annoying. |
| Clean Spoolie (Mascara Wand) | Combing through lashes during and after removal. | Even distribution; helps move the oil through the lashes to ensure every bond is coated. | Over-brushing; if used too aggressively, it can pull out natural lashes that aren’t ready to fall. |
Long-Term Lash Health and Maintenance
Taking care of your lashes is a year-round commitment. It isn’t just about how to take lash extensions off at home. You want to build a routine that supports natural growth. This means eating well and being gentle with your face. Healthy lashes make every makeup look much better anyway.
- Daily Hygiene: Wash your lashes every single day with foam.
- Diet and Supplements: Biotin and Keratin help hair grow stronger.
- Gentle Makeup Removal: Never rub your eyes to remove mascara.
- Sleep Habits: Try sleeping on your back to avoid crushing lashes.
Now that you know how to take lash extensions off at home, you are ready. Just remember to stay patient and use lots of oil. Your natural lashes will thank you for being so kind. Enjoy your fresh, clean face and your healthy natural look. Would you like me to go into more detail on how to choose the best lash growth serums for your recovery phase?
Frequently Asked Questions
Can I use a sauna to speed up the removal process?
While heat and humidity help, a sauna is generally too intense and can cause skin irritation when combined with oils. Stick to localized facial steaming for better control and safety.
Is it safe to use a blow dryer to heat the oil?
No, never use a blow dryer near your eyes. The hot air can cause severe dryness, corneal burns, or blow loose extensions and chemicals directly into your eyeball.
How do I remove glue from my skin if it drips?
Soak a cotton swab in olive or coconut oil and gently rub the area. Avoid picking at the dried glue, as this can tear the delicate skin of the eyelid.
Can I remove lashes while wearing contact lenses?
Absolutely not. Contacts can absorb the fumes from professional removers or become coated in oil, leading to permanent lens damage and eye infections.
Does the age of the extensions affect how hard they are to remove?
Yes, older sets usually have more “brittle” glue bonds, making them easier to remove. Fresh sets have a stronger, more flexible chemical bond that requires more dwell time.
Can I use micellar water for lash removal?
Only if it is an oil-infused micellar water. Standard oil-free micellar water is designed to preserve extensions, not remove them, and will be ineffective.
Why do my eyes feel blurry after using oil for removal?
This is usually a temporary side effect of oil getting onto the surface of the eye. Flush with cool water or saline drops to clear your vision.
Is it normal for my natural lashes to look shorter after removal?
Often, this is an optical illusion. You have become accustomed to the length of extensions, making your natural lashes appear smaller by comparison.
Can I use a lash curler immediately after removal?
It is best to wait 24 hours. Your natural lashes may be slightly softened by the removal oils, and mechanical curling could cause them to snap.
What should I do if an extension is glued to my eyelid skin?
Apply a heavy layer of cream remover or oil and wait ten minutes. Do not pull, as the skin on the eyelid is the thinnest on the body and tears easily.
Can I use waterproof mascara to hide gaps during a lash break?
Avoid waterproof formulas during your recovery phase. They require vigorous rubbing to remove, which can damage the follicles you are trying to heal.
Will crying help dissolve the lash glue?
No, tears are saline-based and do not contain the lipids necessary to break down cyanoacrylate adhesive.
Can I remove individual “flare” lashes the same way as extensions?
Yes, but flares often use a different, latex-based glue. These respond very well to oil but may require a slightly longer soaking time.
How do I clean my tweezers after the removal process?
Wipe them with 70% isopropyl alcohol or a professional tool disinfectant to remove any adhesive residue and bacteria.
Is it safe to remove extensions if I have a stye?
No. Wait until the stye is completely healed. Manipulating the area and applying oils can spread the infection and cause significant pain.
Can I use a toothbrush to brush off the lashes?
Never use a toothbrush near your eyes. The bristles are too coarse and carry bacteria that can cause corneal abrasions or infections.
Does lash removal cause permanent lash loss?
Only if done incorrectly. If you allow the bond to dissolve and the lashes to slide off, your follicles will remain perfectly healthy.
Can I use a magnifying mirror during removal?
Yes, a magnifying mirror is highly recommended. it helps you see the base of the lash clearly so you don’t accidentally grab your natural hair.
What if I accidentally pull out a natural lash?
Don’t panic. A single pulled lash will eventually regrow, but it may take 6 to 8 weeks to reach its full length again.
Can I use baby shampoo to remove lashes?
Baby shampoo is great for cleaning lashes, but it will not dissolve the glue. Use it only after the removal process to wash away oil residue.